Server optimization for high traffic web systems using multiple retry and learning timeout patterns

Excerpt

A webpage typically will be as slow as the slowest request in the page. So if for a high traffic website like Yahoo! frontpage has lots of such possibly slow external apis, it could hold webserver processes and also effect user experience. Multiple Retry is a feature meant to optimize server resource utilization and efficiently use webserver processes/threads.

Description

Server optimization for high traffic web systems using multiple retry and learning timeout patterns.
Multiple Retry is a feature meant to optimize system resource utilization while still allowing a webpage to accommodate requests that might take a long time for the responses to come back. It uses two open source technologies Squid and Traffic Server (recently open sourced by Yahoo! under apache license).
The main principle behind it is to delegate the request to an offline proxy system such as SQUID to perform the actual request. This allows the initial request to use a very small timeout but yet the proxy system will continue to wait for the request to complete and then cache the response once it comes back. A subsequent request or ‘retry request’ is made to check the data in the proxy system cache instead of the actual source. The timed out request sends the squid key back to the client to track the availability of the resource quickly without going through the normal web server route.
How to set environment variables in Mac OS X Lion (For PHPunit purpose)

In my recent web application development, I need PHPUnit to run in my Macbook Pro Mac OS Lion X Lion. In my previous post I installed PHPUnit using PHP pear on XAMPP. 

Now I need to run it without evoking all the the path to the XAMPP bin files located at /Applications/XAMPP/xamppfiles/bin

So I need to set the environment variabel setting location in my Mac OS X Lion. We can do this with two easy steps.  

First: Open /etc/path files with terminal:

$ sudo vim /etc/path 

Second: Add /Applications/XAMPP/xamppfiles/bin to the bottom of the file. In my Mac, it look like this: 
/usr/bin
/bin
/usr/sbin
/sbin
/usr/local/bin
/Applications/XAMPP/xamppfiles/bin
~                                  

That's All

Installing PHPUnit on XAMPP Mac OS Lion


How to Install PHPUnit on XAMPP installed on Mac OS X Lion: 

First you need to add the phpunit channel: 

$ sudo /Applications/XAMPP/xamppfiles/bin/pear channel-discover pear.phpunit.de
Adding Channel "pear.phpunit.de" succeeded
Discovery of channel "pear.phpunit.de" succeeded

$ sudo /Applications/XAMPP/xamppfiles/bin/pear channel-discover pear.symfony-project.com
Adding Channel "pear.symfony-project.com" succeeded
Discovery of channel "pear.symfony-project.com" succeeded


Then Install Pear PHPUnit with the following command:
$ sudo /Applications/XAMPP/xamppfiles/bin/pear install phpunit/PHPUnitDid not download optional dependencies: phpunit/PHP_Invoker, use --alldeps to download automatically
phpunit/PHPUnit can optionally use package "phpunit/PHP_Invoker" (version >= 1.1.0)
downloading PHPUnit-3.6.10.tgz ...
Starting to download PHPUnit-3.6.10.tgz (118,595 bytes)
..........................done: 118,595 bytes
downloading YAML-1.0.6.tgz ...
Starting to download YAML-1.0.6.tgz (10,010 bytes)
...done: 10,010 bytes
install ok: channel://pear.symfony-project.com/YAML-1.0.6
install ok: channel://pear.phpunit.de/PHPUnit-3.6.10


References:
http://jeffreybarke.net/2010/08/how-to-install-phpunit-with-mamp/

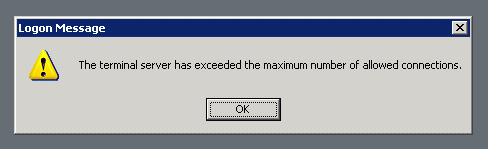
Mengatasi Masalah Logon Message "The terminal server has exceeded the maximum number of allowed connections"


Seringkali ketika kita mengakses Microsoft Windows Server secara remote, tulisan "The terminal server has exceeded the maximum number of allowed connections" muncul. Sehingga kita tidak bisa mengakses komputer tersebut secara remote, ini situasi yang tidak mengenakkan bagi Administrator yang mengandalkan Remote Desktop Connection untuk mengakses servernya.

Sebenarnya pesan itu disebabkan karena server membatasi koneksi remote yang aktif. Apabila pada saat kita melakukan Remote Desktop dan mengakhirinya dengan hanya menekan tombol close, tanpa melakukan logout terlebih dahulu. Maka Windows akan mencatat bahwa masih ada user yang terkoneksi. Dan jumlah koneksi inipun dibatasi jumlahnya.

Walaupun pembatasan dilakukan pada sesi Remote Desktop, pada sesi console banyaknya user yang melakukan remote tidak dibatasi. Oleh karena itu kita bisa melakukan trik berikut ini apabila terjadi masalah.

Klik Windows -> Run

Kemudian ketikan mstsc /v:00.00.00.00 /f -console

Dimana 00.00.00.00 merupakan IP address dari komputer yang anda ingin remote.

Perintah ini akan menggunakan sesi console untuk masuk ke dalam komputer yang anda remote dan setelah itu anda dapat membuka Terminal Service Manager untuk mereset user yang "nyangkut" tadi.

Selamat Mencoba!


Referensi:


Artikel Untuk Domainkeys di Zimbra

http://layangan.com/asfik/blog/2010/08/13/domainkeys-identified-mail-di-zimbra-postfix/


http://blog.pnyet.web.id/2010/03/17/improving-domain-key-di-zimbra.html

http://vavai.com/2010/12/22/implementasi-domainkeys-pada-zimbra-sles-11-sp1-menggunakan-opendkim/

Done!

How To Install Nagios on Ubuntu 10.04


References:
  • http://library.linode.com/server-monitoring/nagios/ubuntu-10.04-lucid
  • http://www.ubuntugeek.com/nagios-network-monitoring-system-setup-in-ubuntu.html
  • https://help.ubuntu.com/10.04/serverguide/C/nagios.html

How To Monitor Network with Ntop on Ubuntu 10.04 and Mikrotik


Install Ntop

$sudo apt-get install ntop

Next, Configure Ntop

Set Admin Password

$sudo ntop --set-admin-password

Restart Ntop Service

$sudo /etc/init.d/ntop restart

Then check if your ntop already running by visiting

http://[your_ntop_server_ip]:3000 (without [ ])

Next, we configure ntop to receive Mikrotik's traffic flow

Select Menu: Plugin -> NetFlow -> Activate
Select Menu: Plugin -> NetFlow -> Configure
Edit the Netflow Name = Mikrotik (activate)
Edit Local Collector UDP Port = 2055
Edit Virtual NetFlow Interface Network Address = [your_mikrotik_ip_in_cidr_format]
Select Admin -> Switch Interface -> Select Mikrotik
If your ntop service is up and running, next step is to configure mikrotik.

Enable traffic-flow on mikrotik by following these steps below:

[admin@Mikrotik] > /ip traffic-flow
[admin@Mikrotik] /ip traffic-flow> set enabled=yes
[admin@Mikrotik] /ip traffic-flow> print
enabled: yes
interfaces: all
cache-entries: 4k
active-flow-timeout: 30m
inactive-flow-timeout: 15s
[admin@Mikrotik] /ip traffic-flow> target
[admin@Mikrotik] /ip traffic-flow target> add address=[your_cacti_server_ip]:2055 \
\... version=9
[admini@Mikrotik] /ip traffic-flow target> print
Flags: X - disabled
# ADDRESS VERSION
0 [your_cacti_server_ip]:2055 9
[admin@Mikrotik] /ip traffic-flow target> print
Flags: X - disabled
# ADDRESS VERSION
0 [your_cacti_server_ip]:2055 9

After a while your ntop will began collecting data from Mikrotik traffic Flow. Done!

*Update:

It seems that the current version of libpcap in Ubuntu 10.04 has bug in it. So I need to manually upgrade to the new version (libpcap-dev_1.1.1-2_all.deb)

References:
  • http://fisikaunud.wordpress.com/2008/10/08/network-monitor-ntop-di-windows-dengan-mikrotik/
  • http://www.mikrotik.com/testdocs/ros/2.9/ip/traffic-flow.php
  • https://help.ubuntu.com/community/Ntop